Discover The “5 Cs” of Survivability

In today’s blog post I’d like to start first with defining the difference between survivability and preparedness. Prepping or preparedness is generally a process and overall frame of mind toward being ready to respond in challenging times. This can mean preparing the home, your office, your car for most likely challenging situations that could occur. 

In contrast, and as the name implies, survival or survivability is the likelihood of a person or group to survive those challenging times. 

Survivability can be defined as the ability to remain alive or continue to exist.”

Let’s consider the “Five Cs” of survivability within this context then. They typically imply a person is in these challenging times already, and with the presence, and proper knowledge of the use of these items, survivability can be greatly improved. 

One more note before we launch into each of the “Five Cs”.  Very often the “Five Cs” are discussed within the context of wilderness survival. Although necessary to understand this value, I’m going to challenge myself by adding in a few additional concepts around survival in more urban type environments as well…. Here we go…

Cutting Tools

Yes, a knife!  But not just any old knife. There are many different purposes for knives; and depending on the challenge ahead, different knives might be recommended. 

Those who like to fish, know that the proper knife can make the process of cutting line or cleaning the fish much more (or less) pleasant.  

Many feel that a simple multi-tool will do the job, such as this one from Gerber, or Leatherman. A multi-tool added to a go-bag or get home kit is an absolute must.  However, if you’re striking a magnesium stick to start a fire, a straight, fixed blade might be a better option. 

Of course, I couldn’t discuss knives without at least touching on their value as a security tool.  Having a small multi-tool with a fold out blade is not a very good answer when needing quick access for self defense. Again a good quality straight edge would be a better option. And in some areas and some purposes, even Bowie or machete-type blades have their values. Ed did a quick review of the SOG Seal Pup Knife at the following:

So, starting off, really consider what purposes you might have for a cutting tool and augment your bag(s) with the appropriate tools.

Combustion Device

Next, let’s talk about fire!  It gives heat and light and within the right framework brings great comfort and happiness. But living within a city?  Aside from a home fireplace, Is there really a need?

To answer the question simply, yes. But first let’s just talk from the perspective of history and skill.  To have the ability, by multiple means, to start a fire, is a great feeling!  Imagine yourself as Tom Hanks’ character in Castaway, standing up with arms spears wide, yelling out, “I have made… FIRE!” 

It’s so much fun to learn the different ways to start it and keep it going. 

Now, onto the actual ways to start a fire. Of course, there’s the ok standby, a lighter (or multiple lighters to be safe). This is always a good idea to have some lighters around and available. But they do run out of fuel, and often at the most inopportune times. One side note here, I recommend those with longer handles to reach into a kindle pile for lighting. 

Another very popular way to start fires are Ferro Rod (possibly along with a magnesium block) with Striker, such as this one from Uberleben

Zunden Firestarter from Uberleben

Matt did an Unboxed Prepping Review of this little tool.  Check it out here:

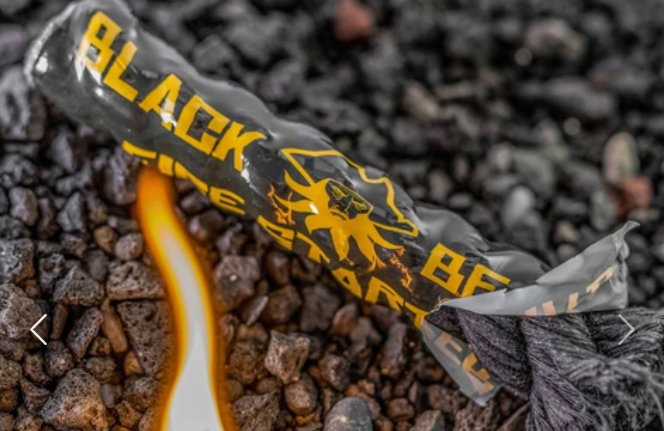
These are great, and with the proper experience, a person can start a fire just as quickly as a lighter and almost never risk running out of fuel. As with most other fire starting cases, it’s also important to have some fire starter material such as dry tinder, cotton balls in petroleum jelly, dryer lint, or those pre-made fire ropes (like this one).

Black Bear Fire Rope

Definitely consider adding these to your go bags. 

To learn more about the difference between Ferro and Magnesium, check out this article 

There’s another tool, called the piston fire starter that’s similar to the ferro rod solution. Only it requires a couple of pretty specific items first before it will work effectively. Namely, the char-cloth in the tip of the piston allows pressure to create a spark with the premade char cloth. It’s quite ingenious and actually pretty fun to test your fire making skills. I would not necessarily recommend it for a go-bag mainly because you would likely have a limited amount of char cloth, and a fairly limited number of opportunities for fire. 

I’ll conclude this section with the more dramatic fire starter skill, the bow drill. Although there are plenty of videos of people (I suspect highly trained people) using a bow drill to start a fire in a matter of seconds. I also highly suspect this is in ideal conditions with dry wood, no wind, and an expert at the helm. Unless you practice this specific set of skills regularly, I would not recommend this being a part of any go-bag. 

Cover

Next let’s discuss cover, aka shelter, aka tarp, aka tent… so many different ways to provide protection from the elements. If out in nature or even your backyard, a simple tarp, pole and stakes will do the trick to keep a person protected. If you read anything about thru hikers (eg Appalachian Trail), the tarp is often the best option for shelter. It’s cheap, compactable and stands up to just about any weather. However I would caution a user to try many different ways of setting it up in different conditions (wet ground, cold, extreme heat, rocky ground) to be better prepared when difficult times arise.

In emergency cases something as simple as an emergency poncho or bivvy (bivouac) sack might be good lightweight options. Both of these options are single person and not intended for the long term, or for protecting anything other than the person (meaning there’s no room for items you may have with you, like a backpack). 

This leads us to some other more common options, the tent and hammock/fly combinations. The tent is seemingly as old as time. If you’ve got a good tent and rain fly you can be prepared for just about any type of experience. Of course consideration should be made to the number of people that would be housed in the tent. As well, weight can be an issue, especially if the disaster experience could cause any significant travel by foot. That’s said nothing beats a good quality lightweight tent for shelter in difficult times. With some of the newer cloth tech used in hammock, these are quickly becoming valuable, lightweight alternatives to tents. It’s very important to have available a rain fly along with the tent to keep it considered as an effective shelter. 

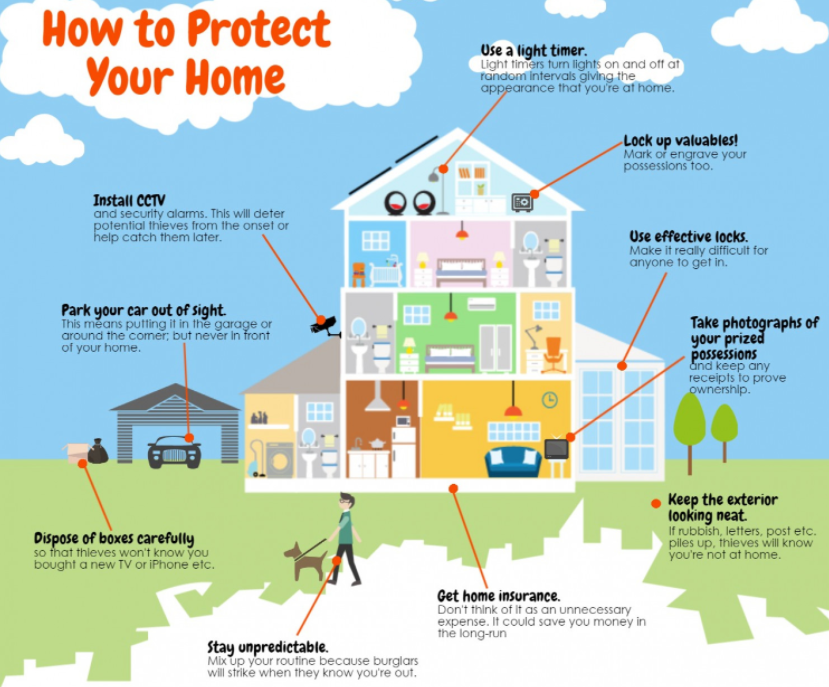
In the most typical disaster situations, a person’s home is the best shelter available. So keeping up solid maintenance on the home is very important no matter the type of abode. And of course in certain areas of the country, special consideration should be given for protection of the home itself. Ideas to consider might include hurricane windows in those areas, lockdown devices on cabinetry and other items in earthquake prone areas, and bunkers for tornado areas. As well it might also be important to consider potential for civil unrest and how one might protect their homes. 

Container

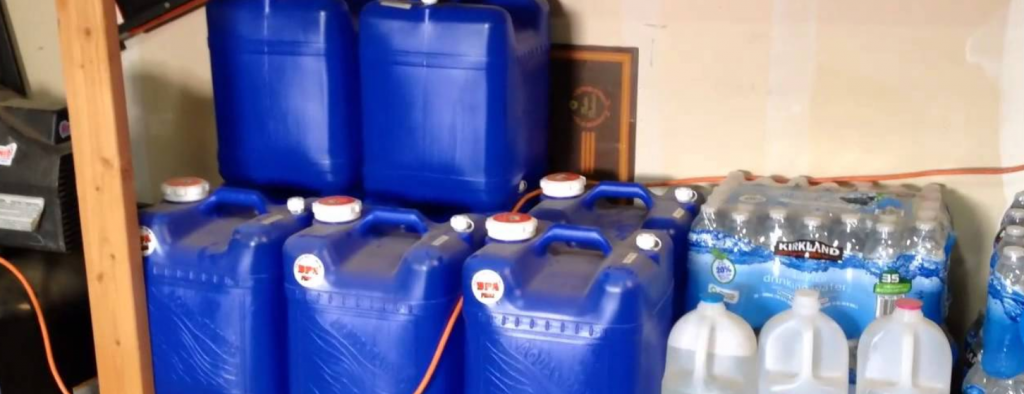
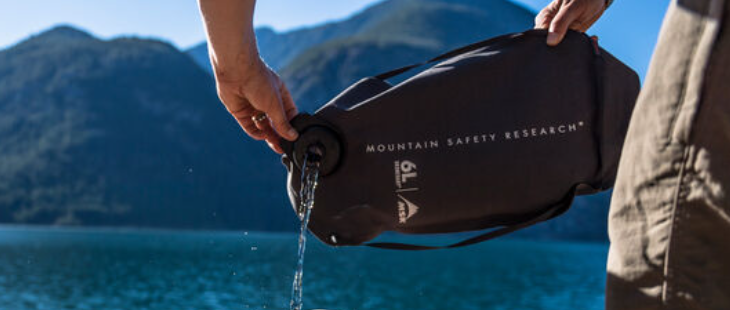
Next, let’s talk about containers.  Containers come in many shapes and forms (e.g. backpack, canteen, water bladder, fanny pack, tote back, compression sack, and more).  Depending on the potential scenarios, different types of containers may be needed.  Survival in the wilderness would need some form of water holding device like a canteen, water bottle, or bowl.  And water really is one of the most important aspects of survival.  I certainly like the dromedary-type bags from MSR

Dromedary from MSR

These are super tough and with a bit more planning a sipping hose can be attached to allow you to hold your water in your backpack while still having access.

But keeping it simple, one can simply find a 1 liter Smart Water bottle and refill it while trekking from one spot to the next. 

Aside from water containers, there are two additional areas of high importance.  Backpack, or other carrying container, and cooking containers.  For carrying containers, look for a solid backpack that’s lightweight and anywhere from 40-50 liters capacity.  This will allow for relatively easy travel.  These are great options for a backpack if you’re looking:

Coulee 40 from Mystery Ranch
Ravine 50 Pack from Mystery Ranch

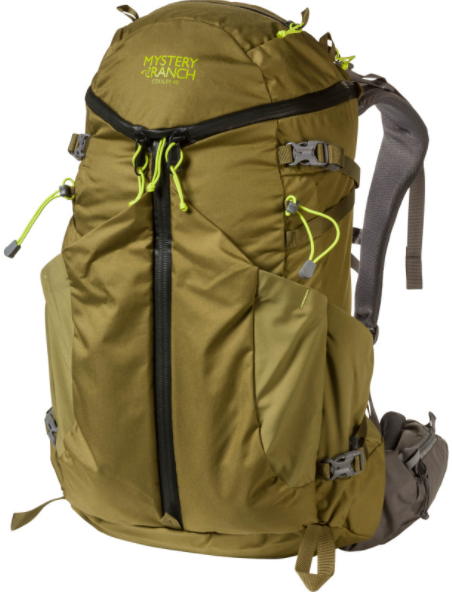
But even picking one up from a goodwill or a flea market can get the job done without breaking the bank.

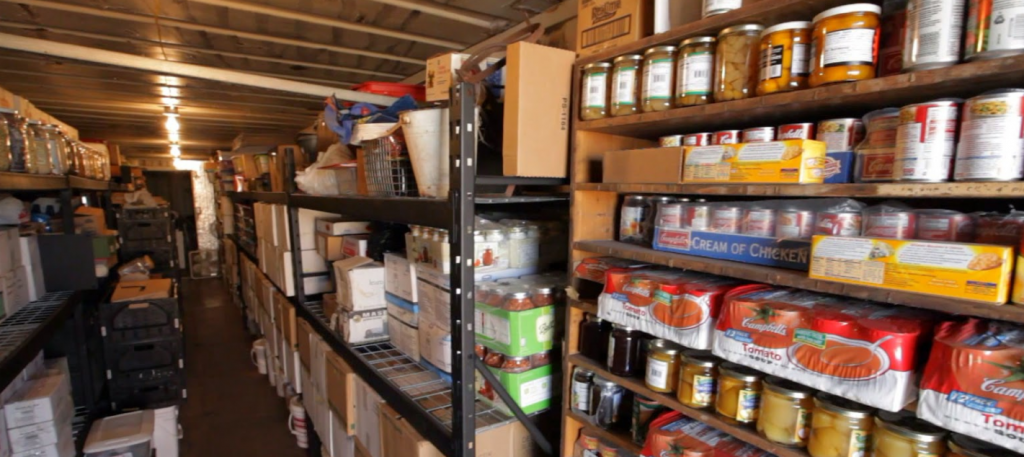
If you’re stationary, or have access to a reliable vehicle (with fuel), then larger plastic bins work very nice for keeping items organized and moveable.  These types of bins (sealable, with snap-shut features) are readily available at large chain resellers.

Now, for cooking containers, there are too many options to name here, but, I really would recommend one of these little kits you can get, like this one from Esbit:

This one in particular is helpful as it has two separate containers in one (cooking pot and drinking cup), as well as a stand and little brass burner, that accepts liquid or solid fuel.  You can try to get by with just a metal cup and perhaps a little rocket stove, but nothing beats the comfort of one of these little premade kits.

Cordage

Finally, we get into cordage.  Like containers, cordage can mean different things and serve many purposes.  When in the wild, like being on a hike, it’s important to bring along an extra bit of cordage so you can hang any food up high in a bear bag, or tie additional items to your backpack. A nice roll of 550 paracord works quite well for most purposes, even a couple of hundred feet makes for a pretty lightweight and smaller package that fits nicely into any carrying container.

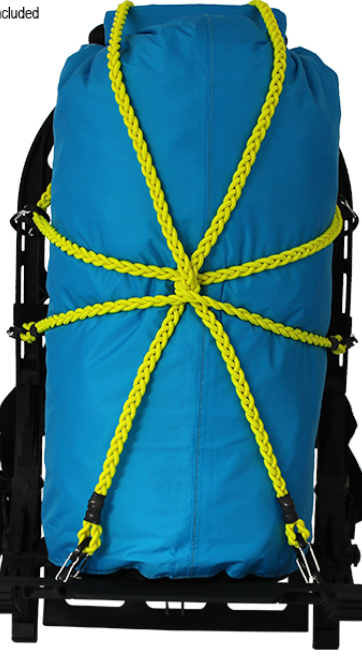
Recently, I’ve also found a number of interesting SpiderNet type cordage that makes it much easier to attach items to loops on your backpack.  Begin that they are often composed of interwoven 550-type cordage, they can be hooked to just about anywhere on your pack with simple carabiner.  Here’s an interesting one from Pack-Rabbit:

SpiderNet from Pack-Rabbit

As well as those more traditional purposes for cordage, there are also some more obscure purposes. In first aid being able to tie a broken limb to a splint can be an important life-saving purpose.  And for protection, if you’ve caught an unwanted individual hanging around your property, cordage can be used to subdue them until authorities can arrive.

One important knowledge base item that should be considered along with cordage is the skill of knot-tying. Here’s a really neat site that can help with training.  It’s got great little animated images for many different types of knots:

And in case you don’t have an opportunity to study on a regular basis it might also be helpful to to throw a little waterproof, knot-tying guide or cards into your bag (something like the Pro-Knot Outdoor Knots Book Ring would really be a good addition).

To wrap up to discussion, I hope this review of the “Five Cs” of Survivability will help our audience to become more familiar with and simplify the concepts around survivability.  If you have any further comments, please leave a message in the comments section below.  

And always remember to be learning better ways to respond well and recover faster.

@genxtalkin

Lost Person Behavior – GenxTalkin on Being Prepared

Lost Person Behavior Cover

I wanted to share my review of a book with our audience this week. It’s called Lost Person Behavior by Robert J. Koester.

My wife and I have belonged to our area’s CERT (Community Emergency Response Team) group for years. Well, a few years ago, we had the opportunity to take part in a training course on Search and Rescue. This was an excellent class! It was put on by the great folks at TEEX (https://teex.org/), the Texas A&M Engineering Extension Service. They are a leader in the delivery of emergency response, homeland security and workforce training and exercises, technical assistance, and economic development.

WHAT WAS IN THE CLASS?

I tell you, they delivered. The small group was very prepared with plans, thoughts, ideas and materials on how to train our groups on the many different aspects of SAR. At one point, we were broken up into teams of 4-7 people. They would hand each table a map and markers and some other documentation. The idea was to listen to the initial report of a “Lost Person”, and using the information gleaned from this book, we were to estimate approximately where the person might be, or might be headed. We were to establish primary and secondary search areas. At certain intervals (only about 5-10 minutes, the instructors would walk around and make another announcement…

“24 hours have passed… new report tells of a red hat, much like the lost person was last seen wearing was found along a particular path.”

We would re-focus our efforts on additional areas with this new information. We had made it through about 2-3 scenarios already, and we were all considering it much like a game, even a competition. We started a new exercise. The lost subject was an elderly man, pretty healthy, who was up in the mountains searching for some ginsing plants. He was last seen, in good spirits, and headed out to his “regular spot”, at about 1pm on a Sunday after church.

Based upon his LKP (Last Known Point) and PLS (Point Last Seen), we had made it through the first couple of “days”, which were actually just five to ten minute periods, providing guidance to our imaginary search crews. Eventually, the instructor gives us one more clue, and it happened to be on day three. According to our guidebook, this estimates an approximate 40% survivability rate, if the subject is healthy!

Day 4 went by very quickly. Things got… more urgent, and although we had a tremendous effort by the team, our table had not found the subject. Another did. We asked how as he found.

“The subject, as mentioned, was an elderly man, and after three and a half days of searching, the gent was indeed found deceased in a cave, less than a mile from the red hat that was found on day two… He apparently had left it as a clue for people to track him as he had broken his foot and couldn’t walk. It appears he died in a cave of a heart attack…”

I was struck at this moment. These “excercises” are actual people that some of these instructors had actually searched for… and found, in this case… deceased. My demeanor immediately changed, and from that point on I wanted to continue to learn more and more about the subject of Search and Rescue.

This brings me to the book, Lost Person Behavior. It was the resource manual we used to estimate direction, distance, intention and even survivability of each of the lost subjects. If one were to actually read through the book, they would glean knowledge of how a lost person actually behaves, as the title would suggest. But more than this, the book defines what it really is to be “Lost”. Not to mention they would get tremendous history of the development of the ISRID (International Search and Rescue Incident Database). This is a compilation of thousands of incidents of lost persons around the globe. This database defines subject categories (identifying a person as a “Gatherer”, or “Angler”, “Child” or “Camper”, and identifies those with dementia or despondency. there are many different categories.

The ISRID primarily looks at lost person data in several ways, ,such as:

  • Population Density (urban versus non-urban incidents)
  • Group Behavior
  • Special Groups
  • Subject Scenarios
  • Search Scenarios
  • Search Times
  • Mobility and Responsiveness
  • Times and Distances

Additionally the book reviews subjects such as Lost person strategies, in which we get to dive deeper into what the person might be thinking. For example… is their traveling random, route-based, or direction-based. Do they appear to have been sampling routes or directions, perhaps to enhance their view of an area? Are they backtracking for any reason?

MYTHS AND LEGENDS

One additional interesting topic covered in the book is the Lost Person Myths and Legends. In this section, they discuss some of the more common mistakes people make and spread around, and they are absolutely false. For example, they cover:

  • Lost persons will turn in the direction of their dominant hand (left or right)
  • Initial search efforts should be directed at the statistical median because of a donut hole pattern of lost person behavior
  • Lost persons almost always travel downhill
  • Mental retardation subjects behave like lost children
  • Lost person behavior profiles tell you where the subject is located
  • Subjects do not travel at night
  • Subjects over 65 can all be treated as one category
  • Investigation always trumps statistical profiles

Each of these myths, can hold some value, but reviews within the Lost Person Behavior book prove that severe and often deadly mistakes can be made by SAR professionals using these myths.

THE END

The book ends with some intriguing and seemingly obvious statements. But I thoughts I’d provide some of them here.

“In order to find a lost person you must look in the right place. Lost person behavior is one of the most important tools in determining where to look… A thorough understanding of Lost person behavior elevated on to a true SAR professional. Search planning is more of an art than a science.”

I truly hope you will take the opportunity to engage with a local Search and Rescue team in your area. But before you do, take some time to read through the Lost Person Behavior Book. It’s a quick read, and I promise you won’t be disappointed.

Click Here to find it on Amazon

@genxtalkin

Scheduling Your Preparedness

This is such a great subject to discuss, scheduling your preparedness, and for a number of different reasons.  First, if you’re new to preparedness, and there are many of you out there, it can be very daunting to start.  As you do start, you begin to realize very quickly how far behind you may be.  By scheduling out your preparedness, you can see the positive changes taking place, which will help you to stay organized making sure you’re not missing something in your initial planning.

Anyone Can Gain From Scheduling Their Preparedness

If you’ve been a prepper for some time already, by going through this type of process, you can set yourself on a regular schedule, causing you and your family/community to stay prepared for the long run.

As well, consider if you’ve been focused on preparedness, but tend to focus more on one area than another.  For instance, maybe you like the security aspect of preparedness, and not the medical aspects.  Or maybe you’re very into homesteading and keeping yourself fed during difficult times, but have no real idea around security.  Scheduling out your preparedness to include all the different areas will help you and your family to be better equipped.  

Finally, if you’re a long time prepper and feel you’re the best and most prepared, then you may have already missed one major point of preparedness.  That is, to always be learning and to always be improving.  If you feel you’ve reached a point and you’ve got all your security bases covered, maybe it’s time to have a friend review it with you.  If you feel your family can be fed consistently, even in difficult times, maybe it’s time to consider how you can help others in their times of need.  So let’s look at some ways to schedule your preparedness, for now, as a person with beginner or intermediate knowledge of preparedness.

Examples of Scheduling Your Preparedness

Most government Offices of Emergency Management create some form of preparedness for the public at large.  This really can be a great place to start.  Examples of what some provide are shown above.  Eventually, your plan and how you will react for yourself should depend upon your needs.  You should not rely on any external organization, government or other, to solve your own preparedness challenges.  But “borrowing” from these organizations, at the very least, to get you started and develop a schedule and plan will help get much closer to the goal, much sooner.  

For example, the FEMA website, ready.gov shows the following diagram in their Communication Plan documentation:

If you were to take each of these 12 areas and focus on just one per month over the next year, you would find yourself much closer to your family being fully prepared for any natural, and perhaps even man-made, disaster.  You would also find that, as you dive into one of the twelve shown, it may drive you to others.  Learning to go with the flow will only help the effort.  

You might start, in your first month, with simply signing up for “Alerts and Warnings”.  And as you’re researching this effort, you find that several of the apps created for such a purpose are written or sponsored by one of the local Community Emergency Response Teams (CERT).  As you find out more about CERT, this can help you “become more involved in your community”. CERT may give you opportunities to train in basic emergency response, and CPR and First Aid.  Which then can make you more of a resource and you to “Plan more with your Neighbors”.  At this point, you’ve already touched on several of the list of twelve.  

To be clear, I’m not suggesting this is the only way to create a schedule for you to start on your path of preparedness.  But by doing even a small amount of research and putting some form of a schedule in place, you can be more confident the plan will include the many different aspects of preparedness. 

Preparing for Clean Air

Another example of creating a schedule is to use the survival rule of threes, ordering them by priority, and then placing them into regular intervals of achievement.  Starting with air and shelter, give yourself a timeline, for instance, you might start by setting a goal to have enough N95 masks for your entire family.  This became incredibly apparent during the early days of the Covid pandemic of 2020.  Then, we must ensure each person is properly trained on how to apply the mask and at what point the mask becomes useless against different threats, and training is key here.  

Preparing Your Shelter (Your Home)

For shelter, first ensure your home is properly cared for, whether single family dwelling, large piece of land or apartment.  It’s important to make sure the chances of losing your home are very very slim.  Having properly managed finances becomes key, of course, making sure you are living well within your means of income.  If not, find a way to move to a home that fits within your means.  Then of course, be sure the property is insured correctly, so if a loss of home is incurred due to disaster, you’re not left homeless.  

Finally, still focusing on shelter, if you own a home or property, living within your means, also indicates you know how much per year it will cost to maintain that home.  This can be a difficult pill to swallow.  Many people just live in their home until something starts to fall apart, without regular maintenance, and they are always surprised when the roof or furnace needs replacing.  If you perform your own maintenance on your home, you’re already a step ahead because you might be more likely to see something coming.  But, if you don’t, then take a look around your home.  Consider all major appliances, windows, doors, roofs, and try to remember when’s the last time they were serviced.  They are all working to protect or provide for you, so do yourself a favor and get them serviced.  In doing this, you’ll come to realize that this will help you to plan ahead and budget to replace an item, rather than have it fail on you unexpectedly.

As you can see, preparing for shelter may be a bit more of a project than just a single month, because there are so many different areas to consider.  So you may schedule this out over a period of time.  

Preparing Your Water Stores

Next, you can start moving on to collecting water.  Water is incredibly important, and something that can be relatively simple to plan,  It does however require space, so once you settle on a means of collection, plan to stick to that style.  I personally have chosen the single gallon bottles from Crystal Geyser as my storage method.  These bottles are semi-square in nature.  So it makes storing them much easier in my shelving apparatus, and each bottle has a fairly strong handle that makes it easy to pick up multiple bottles at one time.  Within a 4 foot area, I can generally hold about 25 gallons per shelf.  Three or four shelves and I have enough water for most likely events.  Oh yea, and just about every other week, there’s a sale at 10 for 10 bucks!  This is not to say this is the only means of water collection, but it does allow for excellent ways to acquire, manage and store it.  And of course, I can use these bottles as a normal part of our daily routine and keep cycling out older bottles over time.

Preparing Your Food Stores

This brings up an important point now as we start to transition into food storage.  Cycling in new food, and cycling out older food stores.  There’s a concept in some preparedness circles called “Shopping Your Pantry”.  It simply means two things.  First, when you go to the grocery store a large part of the shopping effort should be to replenish items used from your pantry.  So when you see those sales of two items for seven bucks, or something similar, you pick them up in order to build up your reserves at home.   Depending on your financial situation it could be one or two weeks to build up your pantry, or it could be several months.  But once you do this, you will start to realize how easy it can be to build up a reserve.  You can easily meet and exceed the recommended 1-2 weeks of food reserves in your pantry.  

Second, when you schedule your meals for the upcoming week, plan to look in your pantry first, or “shop” in your pantry for items for the next week of meals. Overall, you may find your grocery bills start going down because you’re able to use what you already have, and only shop for the things you need.  One important point here for those of you health conscious fans out there.  There’s nothing that can replace fresh fruits, veggies and meat.  So, I’m not saying store up on a bunch of packaged meals.  Far from it.  In fact augmenting your groceries with locally grown (even in your own garden or homestead) fruits and vegetables will only help you, and besides it gives you such a feeling of accomplishment to know that the food on your table came from you very own garden.  Just remember, that as you stock up for short term emergency responses, you need to increase your stock with food you would normally eat.  This way you can keep it also on a regular cycle of replenishing foods you’ve eaten with new stocks.

Preparing for Protection

Now that your air, shelter, water and food are taken care of, you can continue with scheduling out how you will protect yourself and your family and eventually assist in protecting your community.  Consider firearms, with proper training and preparation, clearly firearms can be the great equalizer in home invasions, or similar type events, but if for some reason you’re uncomfortable or improperly trained, they can be more dangerous than beneficial.  Really consider this topic and if you decide to move in the direction of any form of firearm, absolutely obtain professional training as soon as possible.

Alternatively, obtaining training in some form of martial arts or combat sport, can help in many dangerous situations.  Examples might be Krav Maga, which is an Israeli Combat form that teaches people self protection with defence and simultaneous counter attack.  I personally feel there are no other self defense skills that will better serve an average person.  However, Krav Maga can also be quite stressful on the body’s joints, so as a person starts to get older, you might consider another form of martial art such as Jiu Jitsu.  If you’ve ever seen some of the early days of the UFC (Ultimate Fighting Championship), there is one particular person that stands out.  His name is Royce Gracie, and is a 185 pound guy that hails from Brazil.  He came into the UFC and faced some of the biggest, most violent opponents and with his calm demeanor proceeded to put them to sleep, or cause them to tap-out in submission due to the severe pain he was causing.  That… is Jiu Jitsu!  Very powerful and perfectly designed for just about anyone wanting to protect themselves.

And finally, for protection, there are always non-deadly options for self defense.  The only thing I would recommend here is be very aware of your local laws related to these types of items.  Some knives, batons, and stun guns fall under the same category as firearms when it comes to them being used in deadly force.  So absolutely do you research first before you settle on your perfect instrument of self-protection.  I have two highly recommended items I typically suggest for people getting started.  First, the Fast-Strike Personal Safety Whip, which is a perfect tool for an average person just trying to be prepared for hiking, biking, running, or just walking home from work at night.

And then second is a fairly common tool, often referred to as the “can of mace”.  I say this in quotes because I think there are better alternatives to the traditional spray.  Namely, the SABRE RED Pepper Gel Spray for Runners, or something similar.  This little tool is great because it’s so light and unobtrusive, yet very effective if you find yourself in a potentially dangerous situation.  Just point, and spray, and this GEL, will cover and stick to a person’s face causing a fairly severe reaction by a perpetrator.  The nice thing about a gel, rather than the spray, is when in a windy environment, sprays can just as easily get whipped back in your direction causing issues for you and your own eyesight.  With the gel, this is no longer an issue.

Whatever means you use, just continue to focus on the purpose of the protection while undergoing your training or research.  If your goal is to “Protect this House”, this can often be done pretty well with a shotgun and a box of shells (again, with proper training and understanding of the weapon).  But if you’re more comfortable with using martial arts as your primary defense, make sure the training you receive is designed to protect you in specific dangerous scenarios.  It won’t do you any good to learn Karate Kata for 3 months (no offense Karate fans…  Heh heh), and never know how to respond when a person attacks you from behind one late night after work.

I hope you’ve gained some understanding from this blog on how you might start on your road to preparedness by scheduling out the different areas.  It may seem daunting at first, but as you start to get into it, and your understanding improves, I promise you will become more comfortable, and you will be more at peace!

Until next time… Matt Marshall… signing off!

@genxtalkin

Making A Plan – National Preparedness Month

Hey there all you GenXers. In honor of National Preparedness Month, I wanted to share with you some thoughts on one of the biggest parts of being prepared – Making A Plan…

But first, before I really launch into it, I wanted to start with a special thanks to our listeners and viewers. We’ve hit more than 500 downloads of our podcast in about one month! That’s a pretty incredible feat! And we wouldn’t be here without you, our loyal audience. Thank you and thank you!

For those who haven’t already done so, consider subscribing at:

podcast.genxtalkin.com   

With all that said, onto the blog of the day… It is National Preparedness Month, and that mainly means we focus on two things, making a plan and creating a go bag. We’ve spent some time in a couple of past episodes talking about the different types of bags; edc, go-bag and bug out bags, and the get home safe bag. And for sure we’ll dig deeper into these in future episodes. 

For today we’re focusing on the first half, making a plan. 

I think one of the important concepts around making a plan is first to realize it’s never just one plan at all!  There can be…

  • Fire escape plan – the most popular preparedness-related search on Google
  • Shelter In place plan – Wanna keep it all in the homestead
  • Evacuation route planning – don’t forget the backup routes
  • Water collection plan – Most important survival topic aside from the air we breath
  • Communications plan – How can we talk to each other, and where can we meet
  • Financial plan – got your budget planned out

This I’m sure is one of the reasons it can take a while to make a plan – when you consider… all the plans. 

Before I go into my thoughts on these different plans, I also wanted to share some simple resources for those starting out brand new…

  • Ready.gov – the base link that provides a simplistic, and yet well organized means to start getting organized in preparedness
  • Communications plan – a very detailed plan on how a family can start getting all the communications together (collecting Information, ensure everyone has a copy, and talk about it on regular basis)
  • Family emergency plan – this is part of the Read.gov site, but delves more deeply into preparing for families with kids (younger, as well as older teens).

There are a plethora of sites and videos and podcasts we can all use when making our plan. Many of these sites are so much more informative than these I’ve listed. However, for those first starting out, I recommend this group of sites because it drastically simplifies the process of making a plan and starting out on your preparedness journey. They tend to lean heavily on the government providing solutions to our preparedness problems, but I think that’s because these days, so many people already rely on the government.

Over time, individuals and communities can and should become more self reliant, so they don’t have to rely on the government. That’s part of the reason Ed and I started the podcast, to start building community (virtually), to inform and educate, and even to learn more for ourselves from what others are doing.

Let’s take a look at some of the most basic plans we can make.

Planning to Shelter In Place

For Shelter in place I personally think, and I believe most preparedness-minded people walk this same path, that it’s important to first define what are your greatest threats. If you know what you and your community are most at risk of encountering, then you can more easily prepare to combat them.

In some of our episodes of GenXTalkin – On Being Prepared, we’ve touched briefly on the different types of threat events, but I’d like to clarify these very quickly…

High Impact, High Frequency – traffic jams, reside in or travel through a dangerous area, fires in certain areas, epidemics and disease breakouts, house fires

High Impact, Low Frequency – large weather events, emp, hacking/cyber  attack on fuel pipelines, regional attacks, regional wildfires, loss of source of income

Low Impact, High Frequency – traffic jams, vehicle out of gas, pick pockets or mugging (could be higher impact), ran out of food at home

Low Impact, Low Frequency – heat waves, gas prices risen, minimal storm surge

One helpful way to understand realistic threat events in your area is to use the National Risk Index.

This is primarily for natural hazards, but has some additional factors as well. Click on the link and look for the “Explore the Map” option. This will open an interactive map of the US, allowing users to zoom into their respective county. Select a county of interest, and in a side panel, the following options are available:

  • Risk Index – risk levels relative to the natural hazard threat (hurricane, tornado, volcano…), and compared to other areas of the state and nation.
  • Expected Annual Loss – based upon property values and potential for risk
  • Social Vulnerability – how susceptible is the community to the adverse impacts of natural hazards.
  • Community Resilience – ability for a community to prepare for anticipated natural hazards, adapt to changing conditions, and withstand and recover rapidly from disruptions.

One more important aspect of this Index is one can quickly create a report, similar to this one for Cook Country (Chicago area), which shows these results for your selected county (CAUTION: it may take a while to load in the next tab). This can be a great tool for getting to the main root of what problems may occur for your community. Armed with this information we can get an idea of what itmes we may need to purchase or organize in case the threat event occurs.

Planning to Evacuate or Get Out Quick

The government recommends having a Bugout, or Go Bag in the event you have to get away from home quickly. And most preparedness minded organizations add onto this in saying, within 15 minutes, you should be ready to go with all you need for at least 72 hours, but supplies for one week is even better. Preparing to evacuate can be a scary, and daunting task, and it can take on many forms.

The most popular search on Google, if you look up the keyword preparedness, is related to Fire Safety. So you really should start here. How to prepare self and family in case of fire is very prevalent in the minds of folks in the US. For an individual, it really can be as simple as becoming familiar with escape routes from each room. If you’re at work or school, take a look at the fire escape plan. Just about every building will have one posted in a very public place, because OSHA Standards basically require it for businesses. Know which way you would go if there were a fire alarm, and regularly do a quick review of that path, so you can recognize it, even when you can’t see (due to smoke).

As well, if you travel for work, get in the habit of doing this in hotels, airports and your temporary place of work. Good to at least get a basic idea of layouts.

You will also come to realize that many organizations themselves identify a “Floor Safety Manager”, who is someone very familiar with how to respond in emergencies, and is tasked with regular drills and directing people where to go during those emergencies.

Interesting fact from the September 11, 2001 WTC Attacks. Many lives were saved because a couple of very dedicated safety managers drilled the escape plan so many times over the years. Those safety managers were in the WTC building when the original attack occured in 1993.

9/11 – One Day in America

Next, create a fire escape plan at home. This should be two fold. First, ensure everyone knows how to get out of the house very quickly and by multiple pathways. This way if one direction is blocked, they can get out another way without hesitation. It also might be fun one of these days to wake the family up in the middle of the night with very loud music and banging while you’re waving a flashlight around yelling “FIRE! FIRE!, EVERYONE OUT! HURRY!!” ; )

Also consider where your gathering points might be staged. There should be two, one right outside the house (near a tree) and one should be slightly further away, like a neighbor’s front porch. These locations should be clear to anyone visiting as well. Saying something like “gather where the old tire swing used to hang” won’t help visitors understand, whereas “Go to the big tree in the front yard” would work great!

Planning Your Communications

Most important here is understanding how important it is to have proper communications. Without communications, how will we know:

  • where to meet up
  • when to meet up
  • what do we do when the first meet up location fails
  • What are our next steps
  • what direction I’m headed
  • or simply… is my family OK?

Start with the basics for the Communications Plan. First, collect important information such as phone numbers; for each other, for friends and family, for doctors, hospitals, dentists, ob-gyn, etc. Collect information around children’s school (including college), and adult workplace emergency plans. Where will the kids be taken (and how, by bus?) in a time of emergency? Always include out of town contacts to use as go-between during large events, and establish a time to check in at regular intervals.

Adding onto the fire escape plan above, establish meeting places ahead of time for additional purposes.

  • Indoor – in case of extreme weather, such as tornadoes
  • In your neighborhood – like the neighbor’s front porch in case you can’t get into your home
  • Outside your neighborhood – to meet up if you’re not at home during emergencies and cannot cannot get there
  • Outside your own town or city, or even state or region – for cases in which you cannot get home and you’ve been instructed to evacuate the area

Next up is to share the information with the family. This is super important. Make small laminated sheets for each to hold in a wallet, purse or backpack. Having this information handy will allow each family member to respond well and recover faster.

Consider adding a couple of apps to your smartphone. My wife and I belong to a volunteer organization called CERT (Community Emergency Response Team). These are present in most urban and suburban areas in the US. Many of these groups create their own smartphone apps, but they also have directed us to the following:

  • AED – which gives a dynamic map for locations of AED (Automated external defibrillators) units – for helping those suffering from heart attack.
  • PulsePoint – emergency organizations around the country submit their events to this app, providing a service like the old scanners, so you can receive alerts on your phone when different emergencies (utilities, natural disasters, flooding, traffic, etc.) occur in your area.
  • USNG – a way to locate yourself during emergencies. This can be key for emergency services trying to locate you during a disaster,
  • CodeRed – Mobile alert service similar to the PulsePoint service above.
  • 311 – Often local counties will have their own version of an app for reporting issues in your area. This is more for community awareness, not necessarily emergencies
  • ERG2020 – Ever wonder what those different colored diamonds on the back of trucks and shipping containers mean? This is the app to answer those questions. Enter the number on teh diamond, or just browse, and you can see the meaning, potential hazard, what the public should do, and how emergency services should respond if there is an issue with the vehicle.
  • Compass – Oh yeah! although if you’re properly prepared, you probably already have an analog compass in your Emergency Kit… Why not have the Compass app as well on your phone?

II’ll finish up the communications plan section with two points. One of the problems that often occurs during natural disasters is that cell phone services get “clogged”. Basically your phone calls just can’t get through, because the network is overloaded with people just trying to reach their loved ones. So, start with just texting instead. Texts are much smaller packets, and a couple of quick lines of text can deliver the message and free up the network for more emergency-type uses.

Second, while you have the chance, take a look around your area with your smartphone. Try to find additional locations at which you can connect to the internet via WIFI. I’m talking about those free locations, like hotels and coffee shops that offer them up for their customers. If you’re stuck in the city, and you can move about on foot, get to a location that still has WIFI up and running and you can be better informed during the emergency. Of course, you want to make sure this is actually a free service. Very frustrating when you’re in the midst of an emergency, and you have to enter a credit card, or email information to gain access. Also, a good reason to plan this ahead is you also want the ability to recognize the WIFI network you’re using. This would be a prime situation for hackers to try to capture unwitting users’ private information by “sniffing” or monitoring that WIFI network. Whether emergency or not, you never want to transmit your personal data, unprotected by VPN, across an unknown WIFI network!

Lastly, you should come to realize that preparedness does not stop at the end of National Preparedness Month… Keep going, and remember that “practice makes PROGRESS!”

@genxtalkin

Games We Play – Situational Awareness

When I was a kid, we would play games. Hide and seek, chase, kick the can… As I started getting more responsible within my family, my father would start to play awareness games. For instance sitting down in a restaurant, he would ask how many people were wearing hats, or eye glasses in the main room. My first reaction would be to start looking around to try to count them. But he would quickly say “Nope, no looking! Try to remember how many you saw on your way in.” Of course I had no idea, so as a kid I’d guess, and usually get it wrong…

Well after a number of times of going through this embarassment, I’d take on that challenge anytime we went out to eat. I thought of it as that, a challenge, and eventually a game. As I got into my early adulthood, I felt I was getting pretty awesome and would try to get others to engage in this type of game. My wife was not all that keen on the game, but it was kindof a fun thing to do.

Some of you may recall the Bourne Identity movie from 2002. and there a scene in which Jason and his lead lady are in a cafe, and he starts spouting off all these facts he captured just walking into the restaurant.

In the clip Jason points out so many different areas, like identifying license plates in the parking lot, and which hand their waitress prefers to use. But he also then starts transitioning into other areas, more relative to Situational Awareness. That term may be new to some, so here’s a quick definition to set levels…

Situational awareness is the use of the sensory system to scan the environment with the purpose of identifying threats in the present or projecting those threats into the future.” — SecurityAdvisor.net

We’re basically looking, listening and sensing the common, and then trying to extract out something exceptional. All in the hope that we can avoid threats in the future.

I find it interesting that even as a child I was being taught this skill by playing a game. And I’ve just learned to hone the skill over time. I can’t say I do this every time I go into a restaurant, or department store, or gym. That’s not really the point though. If we take on this, or similar, challenges, we can all grow this muscle a bit more and be more prepared.

There’s a term my wife and I share, “Head On A Swivel”, that gets us both pretty close to upping our awareness in day to day activities – like going for a walk, or going through a grocery store parking lot. Of course what we mean by this is “make yourself situationally aware when in possibly strange or dangerous situations”.

Give it a try on your next restaurant visit. Or consider this, when you’re in the grocery store next time, take a brief moment, locate the exits, and sometimes that closest exit might be out the back door through the warehouse! try to conceptualize what you would do if a fire breaks out at the front of the store, ,or God forbid if an Active Assailant enters through Door Number One, what’s your best path to another door.

One more scenario to ty is the next time you’re at a deparment store, or one of the big box retailers. Again, locate nearby exits, and your paths to safety. Then also consider locations for concealment (meaning a place you could hide from an assailant), and locations for cover (meaning if real bullets were flying, would that rack of cotton t-shirts be better, or should I get behind a pile of generators?).

The goal over time is to get to a level of familiarity with your surroundings and the more you do it, the fast you will be able to do it. Ulitimately, this will help us avoid or respond to threats more successfully, and get us all home safely.

I was watching the recent docuseries “9/11 : One Day in America“, which I would highly recommend if you want to get a real feel for boots on the ground reaction and recovery during the September 11 attacks. The series very good, and highly engaging! One of the points I saw come up regularly was basically “Don’t Panic!” Meaning, when they calmed down, they were able to see more clearly, and get to safety. By running through scenarios when the danger is NOT present, it helps one’s mind better deal with those situations when danger IS present.

Everyone can “play the game”… of course, we may not all hit it out of the park and be as good as Jason Bourne. But hey, we gotta start somewhere, and we gotta start some time. Why not here? Why not now?

— Matt Marshall, GenXTalkin – On Being Prepared